If you are seeking an easy walkthrough to transfer QuickBooks to a new computer, then you have landed at the perfect spot. It is the right choice to upgrade to a new system to leverage the superior features and improvements that come along with it. Users can restore their company files from a backup by installing a newer or identical version of QuickBooks on the new computer. QuickBooks Migrator tool can come to your rescue and facilitate an easy transfer of critical QB-related data to the new computer. This blog aims to shed light on how to move QuickBooks desktop to a new computer without any hassle. Thus, keep read on!
Requirements for Moving QuickBooks desktop to a New Computer
Some of the prerequisites to be ensured in order to move your QuickBooks desktop to a new computer are outlined below.
- Upon installing QuickBooks on the new computer, you’ll need to create an account and confirm that the new computer is connected to the internet.
- It is recommended to back up your QuickBooks company files before removing the QuickBooks desktop from the old computer.
- Keep the disc or downloaded files for QuickBooks at safe disposal.
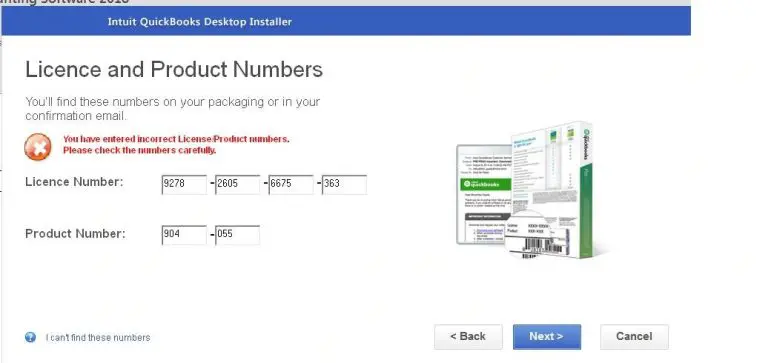
- Secure the license and product keys before transferring QuickBooks to a new computer. You will need it while registering and activating QuickBooks on the new computer.
- While transferring the QuickBooks files manually, you will need to store the QuickBooks desktop files on an external device like a USB device.
What is QuickBooks Migrator Tool?
QuickBooks Migrator tool is a QuickBooks transfer program. If you aren’t logged in as an Admin user, you won’t have access to this feature. The migration utility will let you save up to three sets of company files and their accompanying documentation on a USB flash drive. The data will be physically transferred using a pen drive, while the migration tool handles the technical details in the background. In addition to assisting with file setup, the program can download the appropriate version of QuickBooks Desktop to the new system.
Methods to Move QuickBooks Desktop to Another Computer
Here are the speedy procedures for transferring QuickBooks and its data from an older computer to a newer one:
First, convert QuickBooks Desktop data with the Migrator Tool
You can use the migrator tool or execute the process manually if you need to reinstall QuickBooks desktop or transfer it to a new computer. For your convenience, we have broken down the transfer procedure into two distinct phases. Be sure to have access to the admin account before proceeding, as these actions need the usage of the admin password and username.
Note that you must have Company Admin privileges to access the Migrator Tool. Take your time with first learning the fundamentals of the migrator tool. The migrator operates as follows:

- To access the files transferred to the new computer, you must create a strong password. The migrator utility simply needs to enter the password once. You should also write the password so you don’t forget it in the future.
- After a while, the program will save USB copies of the most recent three company files you’ve accessed.
- Transfer the files using the flash drive. The remaining technical tasks are completed by the Migrator tool.
- After selecting the appropriate QuickBooks desktop version, the utility will download and install it on the target computer, complete with all of the user’s data.
- It’s important to remember that the program did not format the drive or delete any other data on the device.
Directions for Installing and Running QuickBooks’s Migrator Tool
Now that you’re familiar with the fundamentals of the migrator tool and other pertinent details, you may launch the procedures for establishing and utilizing the tool in QuickBooks. The entire process can be bifurcated into two parts – one on the old computer and other on the new computer.
1. Steps on the old computer
- To initiate the process, download the QuickBooks Migrator tool and store it on the flash drive. Make sure to acquire the same from the Intuit website.
- Connect the USB drive to the old computer.
- Now from QuickBooks, navigate to the File menu and then choose Utilities.
- After that choose Move QuickBooks to another computer opt.
- After then, select “I’m Ready“

- QuickBooks will also need the following information: Make an elaborate password for the company’s USB device.

- This OTP will be required at the time of connecting the USB device to the new computer for the first time. Remember the password so you don’t have to keep entering it.
- Follow the on-screen prompts to begin the file-copying procedure.
- This procedure could take some time to finish, mainly depending on the number of company files. The typical size of a company file is between 150 and 250 MB.

2. Steps on the New Computer
The Windows security procedures prevent the migrator utility from automatically starting when you insert the USB disc, so you’ll need to launch it yourself.
- The first step in using the mover program is to launch the Move QuickBooks.bat file from the flash drive.
- To finish the process, input the One-time password you generated.
- The folder containing the QuickBooks Migration tool will be deleted immediately once the transfer process is complete. Other information stored in the USB drive will not be affected. Files on the previous system can be renamed to eliminate any confusion.
- Soon after, click on the Help menu, and select Register QuickBooks.

- To finish the registration, please enter your phone number, address, and license key.

- Although the Migrator tool helps to transfer most of the accounting data to the new computer, some data and information may require manual transfer.
- You may need to sign out of Intuit data protection on the old computer before using it on the new one.
- Users will need to manually log in to the new computer to transfer the QuickBooks payroll and Payment service data. Furthermore, the transfer of multi-user configuration data to the new system is only possible in manual mode.
How to Move QuickBooks Desktop Manually
The transfer of all the QuickBooks data at once requires users to manually transfer QuickBooks from their old computer to the new one. The set of procedures listed below should help:
- Create a copy of the company files and QuickBooks license.
- The user should then create a Back up of the company files to be transferred.
- It is recommended to transfer the latest version of QuickBooks rolled out by Intuit to the computer.
- Proceed by retrieving the backup file of the company file and then running it on the new computer.
- Upon the successful transfer of accounting data, uninstall QuickBooks.

- The subsequent step is to access the company file backup into the new computer.
- Subsequently, download QuickBooks on the new computer.

- Follow up by plugging in the USB containing the backup of the company files.
- After that, users need to run QuickBooks as an admin on the new computer.

- Follow up by heading to the File menu.
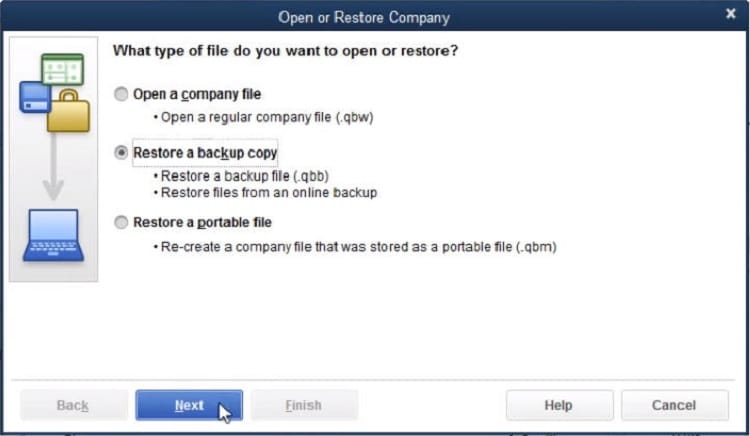
- And then click on Open and Restore company.

- Hit on Restore a backup copy, and then Next.

- Select Local backup and navigate to the backup file you made on the old computer to restore the backup from the external device.

- Next, select a folder on the new computer to save the backup file and click the Save button.
Final Words
We have discussed above all the potential methods to transfer QuickBooks to a new system. For assistance on other issues confronted while using QuickBooks, you can reach out to our experts via a mere phone call at +1-888-368-8874 to avail timely assistance from our experienced QuickBooks support staff.
More Resources


