Here are the most common reasons and solutions for QuickBooks Error H505:
QuickBooks has become an indispensable tool for small and mid-sized businesses globally, thanks to its user-friendly interface and robust multitasking capabilities. A key advantage for many organizations is its ability to support simultaneous access for multiple users (depending on your QuickBooks version), even from remote locations.
However, like all sophisticated software, QuickBooks occasionally encounters errors that can disrupt your workflow. While many minor issues can be resolved with in-app prompts, some require specific troubleshooting. Today, we’re focusing on a common and particularly disruptive issue: QuickBooks Error Code H505. This error specifically relates to multi-user access and can prevent your team from working collaboratively.
This guide will delve into the causes of QuickBooks Error H505 and provide clear, actionable solutions to get your multi-user environment back on track.
Solutions to Troubleshoot the QuickBooks Multi-User Error H505
We are now into the section containing viable solutions for resolving the QuickBooks error H505. Try these solution steps in order to resolve this problem
Solution 1st – Modify your System’s Firewall Settings
- Initially, hit on the Windows key on the keyboard and proceed to Control Panel.
- Within the Control Panel, head to the Firewall Settings.
- After that, choose the Allow a Program through your system’s Firewall.

- Moving ahead, you need to hit on Add Program tab and include QuickBooks 20xx to the exception list.
- Restart your computer to save the changes.
Add the following ports according to the version of your QuickBooks software:
- QuickBooks Desktop 2015: 8019, 56725, 55363-55367
- QuickBooks Desktop 2016: 8019, 56726, 55368-55372
- QuickBooks Desktop 2017: 8019, 56727, 55373-55377
- QuickBooks Desktop 2018: 8019, 56728, 55378-55382
- QuickBooks Desktop 2019: 8091, XXXXX, XXXXX-XXXXX
- QuickBooks Desktop 2020: 8091, XXXXX, XXXXX-XXXXX
- QuickBooks Desktop 2021: 8091, XXXXX, XXXXX-XXXXX
- QuickBooks Desktop 2022: 8091, XXXXX, XXXXX-XXXXX
- QuickBooks Desktop 2023: 8091, XXXXX, XXXXX-XXXXX
- QuickBooks Desktop 2024: 8091, XXXXX, XXXXX-XXXXX
Solution 2nd – Assess QuickBooks Hosting Settings
- In the very start, you need to launch QuickBooks on both the systems configured as multi-user.
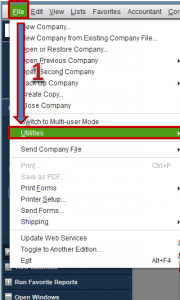
- After that navigate to the File menu and select the Utilities option.

- In the next step choose Discontinue or Stop Hosting Multi-User Access Configuration.
- Now turn on Hosting through clicking on File menu and then hit on the Utilities option and selecting the Host Multi-User Configuration option.

- Lastly, you need to restart QuickBooks software on both the QuickBooks.
Solution 3rd – Make Changes to the Setting of Your QuickBooks Folder Location

- Initially, you need to make a New Folder on the hosting system.
- After that share the folder and set/change Windows access permissions to share company files (contact an IT professional if you are not able to access the QB file server).
- Now copy the .qbw file and paste it to the new folder.
- Finally, open your company file in multi-user mode.
Solution 4th – Use the QuickBooks File Doctor tool
- Download QuickBooks tool hub program, then install it
- Runt the tool hub.
- Head to the Company File issues tab

- After that choose “Run QuickBooks file doctor”, select the company file.
- Then select “check your file and network”.
- In the next step hit a click on “continue.”
- Now enter the QuickBooks admin password.
- Proceed with the scan. This tool will take up to 20 mins time to scan and detect the problem.
Solution 5th – Configure the Firewall Ports Settings
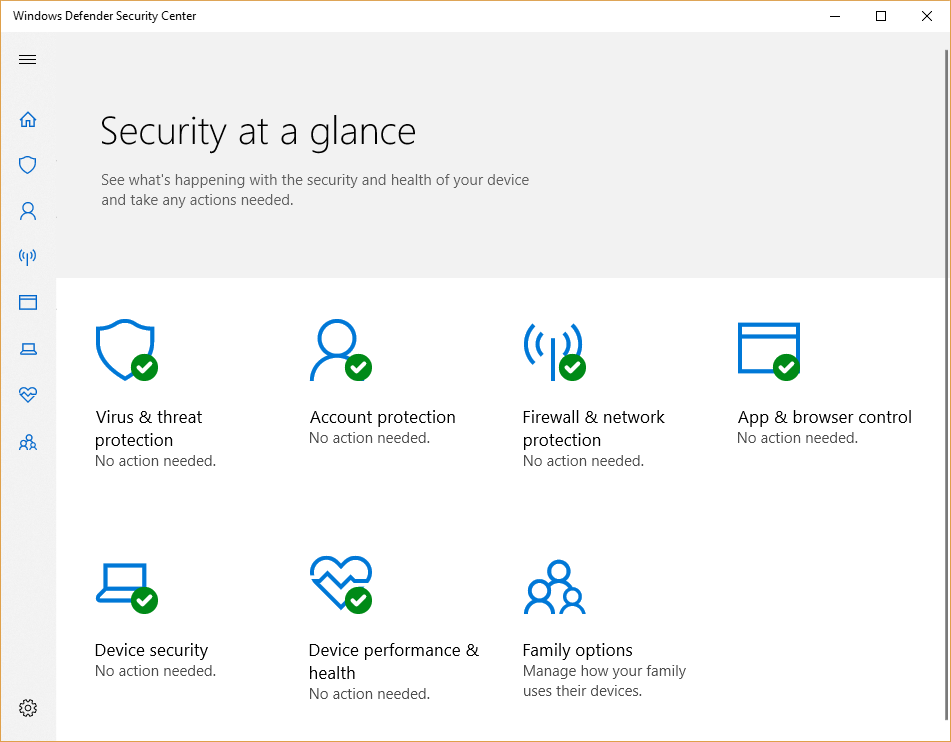
Make sure that the firewall settings are not blocking QuickBooks. You may have to add QuickBooks as an exception or open ports needed by QuickBooks. Usually, these ports are needed to develop a proper network connection. Also disable the firewall and then try to switch to the multi-user mode to host the company file.
- At first, you need to open Run box by clicking on the Windows + R keys together.
- After that type in ‘Control Panel’ and hit on the Enter key.
- Moving ahead, you need to select the System and security option.
- Following that, open the Windows firewall and network protection.

- Now you have to hit a click on the Advanced settings tab and also choose Inbound rule.
- Next step is to choose New rule option and then opt for a Port and hit on the Next tab.

- Now select the correct TCP option.

- Hereafter, you need to enter the port of the QuickBooks year version.
- After the year code has been entered in the respective field, hit a click on the Next tab and restart your PC once.
Solution 6th – Edit the Host File
Step 1: Finding the IP address and system name of the server and workstation:
- At first, you need to hit a click on Windows + R keys on your keyboard. It will pop up the Run box on your screen.
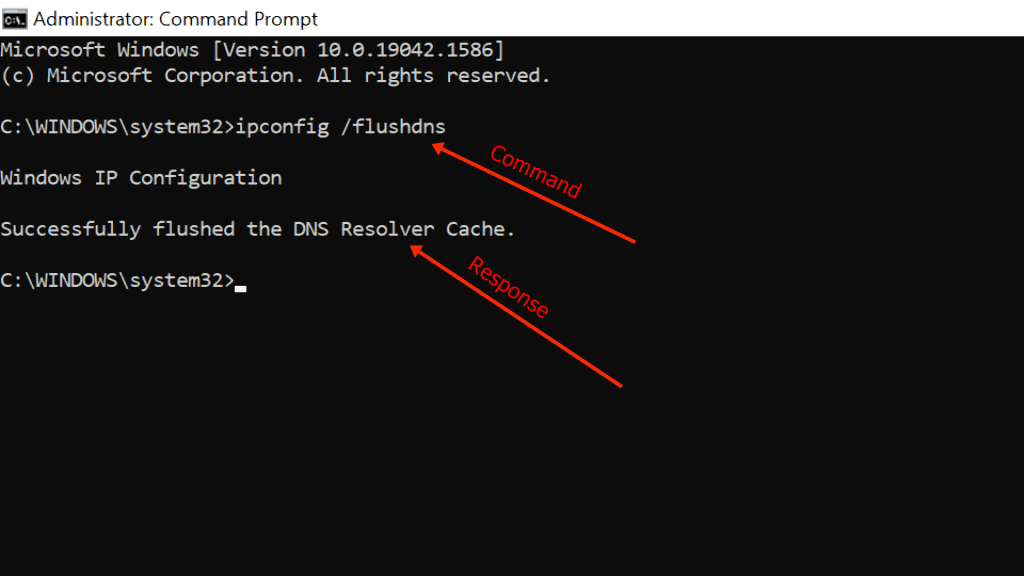
- After that type in ‘Cmd‘ and then press Enter key.
- In the next step, you need to open the Command prompt window.
- Furthermore, enter the ‘Ipconfig/all’ command and press the Enter tab.

- Now you need to find the hostname in the Windows IP configuration section.
- Then provide the hostname and IP address.

- Hereafter you need to repeat the all above given steps into all of the systems with the multi-user setup.
- Now you have to move back to the workstation to test the server. Do the following steps here:
- Move to the Windows start menu.
- Then type ‘Run‘ into the search bar in order to open the Run box.
- Now type in ‘CMD’ into the run window and hit the Enter key.
- Here you need to type ‘Ping’ command and then hit on the Enter tab.

Step 2: Edit the Windows Hosts File
- At first, you need to close the QuickBooks software and move to the Start menu.
- After that move to the PC option and head to the address:
- C:\Windows\System32\Drivers\Etc
- C:\Windows\System64\Drivers\Etc
- If you’re not able to find the Windows folder, then perform the steps to unhide the folders.
- At first, you need to tap on View and then choose Hidden items.
- Now, right-click on the View tab. It will unhide all the hidden files and folder.

- In the next step hit a click on open with notepad option.
- Now fill in the IP address and system name.

- To complete the process, you need to save the changes and then reopen the QuickBooks software in multi-user mode.
Solution 7th – Run the QuickBooks Database Server Manager on Your Server
Step 1: Download and Install the QuickBooks Tools Hub on your Server
- Firstly, you need to close QuickBooks desktop and other apps running on the background.
- Next, you need to download the latest version of QuickBooks Tool Hub program and save the file on your computer.
- Moving ahead, search for the downloaded file (i.e. QuickBooksToolHub.exe)
- To run ToolHub.exe file and install the tool hub on your system, you need to follow the on-screen instructions and Agree to the terms and conditions of it.
- Now hit double click on the created QB tool hub icon to open it.

Step 2: Run the QuickBooks Database Server Manager on your server
- At the very first step, you need to open the tools hub program and then choose Network Issues tab.
- After that choose QuickBooks Database Server Manager option.

- It will open the QuickBooks database server manager on your system.
- Now inside the Database Server Manager, you need to click on Browse button and navigate to the location of your company file and then select Start Scan button.

- You need to select the Start Scan option if you already see your company file folder on the scan folder option.
- The QBDSM will automatically repair your firewall permissions.
- Once the process finishes, you need to hit on Close.
- Lastly, select the File option and Switch to Multi-user Mode.

- In case your workstations can go into multi-user mode without any issues, everything is fixed.
A brief about QuickBooks Error H505 and reasons for it’s occurrence
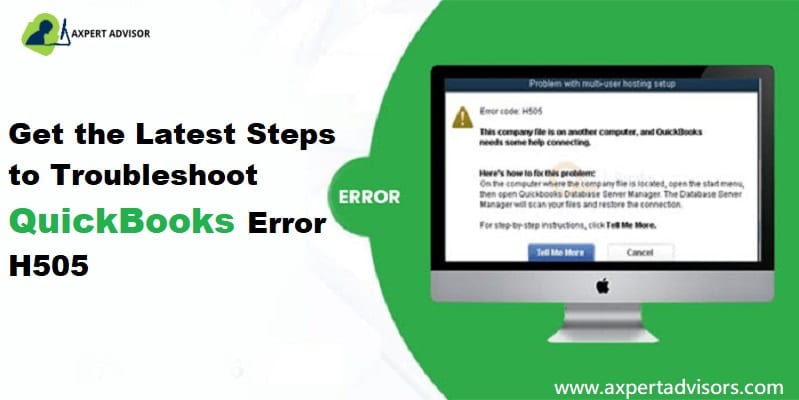
QuickBooks is a prevalent accounting software preferred by evolving businesses. It helps in management of finances efficiently. But even this software can throw up errors and issues from time to time. One such standard error is H505. It can occur if the company file is not located on the computer. This article explains the causes, symptoms, methods to rectify this QuickBooks multi-user error H505. You may get the following image if the multi-user error occurs on your software:
| Error | Description |
| Problem with multi-user hosting setup | QuickBooks has faced a problem and needs to close. Sorry for any inconvenience caused. |
| Error code H505: This company file is on another computer, and QuickBooks needs help connecting. |

Error H505 in QuickBooks enterprise is a part of the H series error in QuickBooks. All these H series errors are hosting settings-based problems. This error usually appears with a message stating that the computer on which the QuickBooks company file is stored needs reconfiguration.
Possible Reasons Behind the QuickBooks Error Code H505
Some of the possible causes of this error code are as follows:
- The QuickBooks file you are trying to access is located on some other computer.
- QuickBooks installed and available in the system server name is set-up to consent to all the shared connections to the company file, however, the QuickBooks accounting software is failing to communicate resulting in error H202.
- Host PC has incorrect settings
- Firewall causing connectivity problems.
- .ND Network file may be damaged.
- The required hosting configuration setting is not appropriate.
- QuickBooks database server manager facing issues.
What are the Symptoms of QuickBooks Error Code H505?
- This error can be identified easily if the multi-user mode is not accessible.
- If in case you fail to access the QuickBooks company file stored on the server.
- Another indication of the same can be when the error H505 flashes on the screen.
- If the system or laptop crashes frequently.
- Windows might become unresponsive and freeze periodically or the software freezes.
Summing Up!
The above-mentioned solutions shall enable you to fix QuickBooks multi-user error H505 and resume working. However, on the off chance that the issue persists, you can contact us and speak to our QuickBooks enterprise support experts via our helpline i.e., 1-888-368-8874. We’ll be happy to help you in every possible way. So, what is the wait for? Just ring us on our helpline and get your queries resolved.
You may also like:


