Learn 9 east tips and ricks to navigate QuickBooks online more faster to make more profits:
QuickBooks Online is a powerful, user-friendly accounting and bookkeeping solution designed to simplify financial management for businesses of all sizes. While it’s intuitive, unlocking its full potential can significantly boost your productivity. This guide provides practical, actionable tips to help you to navigate and utilize the robust features of the QuickBooks software more effectively. By implementing these strategies, you’ll streamline your accounting tasks, save valuable time, and gain greater control over your finances. You’ll learn to do things faster, like creating invoices and receipts, finding company settings and customer details, and tracking expenses, among many other useful features.
Read on to transform your QuickBooks Online experience and accelerate your workflow.
Steps to Navigate QuickBooks Online More Faster
This blog post includes steps to teach you how you can navigate in QuickBooks. Just follow the steps provided and navigate the software like a pro.
1. Know the Dashboard
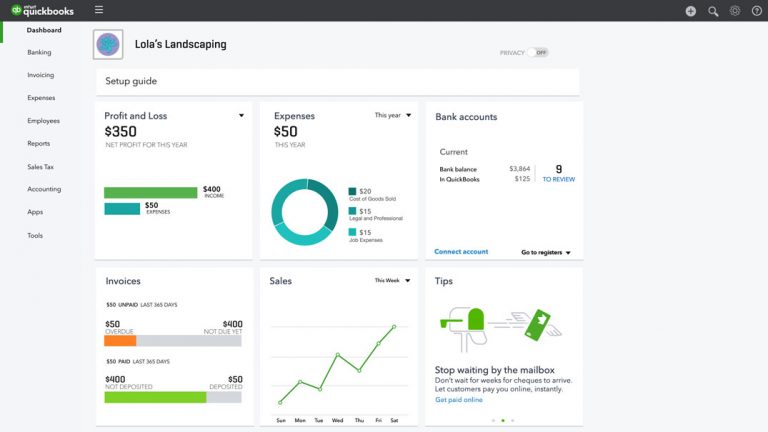
Right after you log in to QuickBooks with your credentials, you will see the dashboard. It shows a quick overview of your business. You can find it in the navigation bar in the first left. It’s simple to use as all you are required to do is to click on the dashboard and read about your business. The dashboard offers crucial information that a must to know for every user.
2. Make Use of the Search Bar

Use the search tab (the magnifying glass on the top right) to find checks and invoices that you have created in the past. Type in unique credentials such as the check date, transaction number or amount to search them.
3. Learn About the Profit & Loss

You can also learn about profit and loss made by your business in the QuickBooks dashboard. Also, you can find bank account details, check balance, get the summary of sales, read customer’s overdue reports, and more.
4. Create Your First Invoice
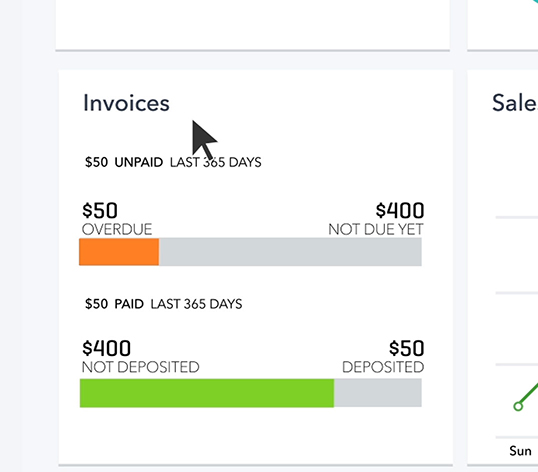
In order to add sales or invoices, you can follow the below steps:
- Tap on the Invoices tab and then head to the blue New Invoice button.
- Type in the client details and Save them. The same customer details will show up in a drop-down menu. Later, when you will have to create invoices, the customer details will be auto-filled.
- Enter price, quantity, and other product details. You will also have to select the tax percentage, required to be included or excluded.
- Choose the Invoice option as per your convenience.
- You may also include special conditions like delivery payment in the Terms Box.
- Hit on Save after the invoice is complete or save it in the draft if it’s incomplete.
5. Add With the Plus Menu
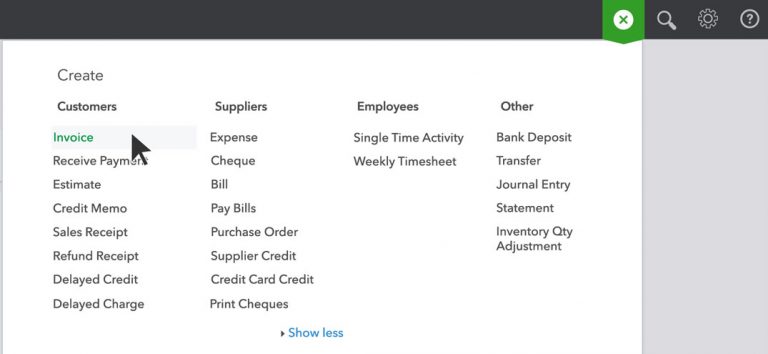
Use the Plus sign to quickly add new items. This feature will enable you to create customers, add transactions, Vendors, Sales receipts or Invoices, etc.
6. Get Familiar With the Left Navigation Bar
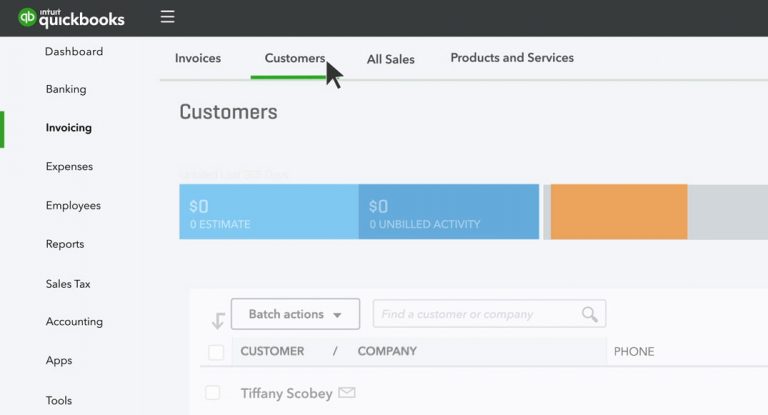
You will find many useful sections in the navigation bar. Here, you can view invoicing reports of your customers as well as your business products, sales reports, and other varied reports that you may like to review.
7. Learn Uses of Gear Menu

The Gear Menu icon holds some seriously useful features. It offers information about your company profile and settings. In the top right corner, you can find the Gear icon is located at the top right. It’s used to manage, find details and make changes and corrections in the chart of account.
8. Read Reports
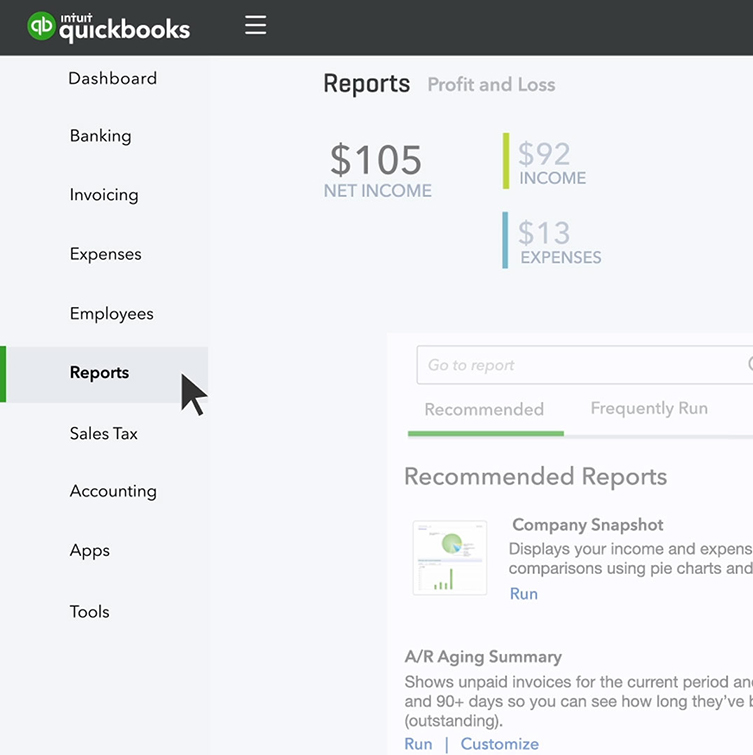
You can find the Reports on the left side of the screen, below the invoices. You can open it from here and also access the QuickBooks reports.
9. Use Advanced Accounting Tools

- The Advanced Accounting Tools is used for budgeting, reconcile, Audit logs, importing data, and other crucial tasks.
- Now, go ahead and test yourself and make more profits. See how much you have learned from this article.
Winding up!
In case you need personalized assistance you can dial our toll-free QuickBooks support number and speak to our certified experts. We will be happy to assist you. Our professionals have been serving clients across the globe and are well versed with all the technical complexities involved in troubleshooting the error codes. All you need to do is get in contact with our experts via phone call and let our experts handle the issue.
Related Articles:


